1. สร้าง Class เพื่อรวบรวมชุดคำสั่งที่เกี่ยวกับการคำนวณในเรื่องของการเคลื่อนที่ไว้ที่เดียวกัน
class World():
 gravity = 9.81

class Particle():
 def __init__(self,center=(0,0),radius=0.1,color='red',theta=45,velocity=0):
  self.center = center
  self.circle = plt.Circle(center, radius, color=color)
  self.theta = np.radians(theta)
  self.v0 = velocity
  self.time_of_flight = self._compute_total_time()
  self.max_range = self. _compute_range() + self.center[0]
  self.max_height = self._compute_height()+ self.center[1]

 def set_position_by_time(self,t):
  new_pos = self.get_position(t)
  self.circle.center=new_pos

 def set_verbosity(self,velocity):
  self.v0 = velocity

 def set_angle(self,angle):
  self.theta = angle

 def get_particle(self):
  return self.circle

 def get_position(self,t):
  sx = self.v0 * np.cos(self.theta) * t
  sy = self.v0 * np.sin(self.theta) * t - 0.5 * World.gravity * (t**2)
  return (sx+ self.center[0], sy+ self.center[1])

 def _compute_total_time(self):
  t = (2 * self.v0 * np.sin(self.theta)) / World.gravity
  return t

 def _compute_range(self):
  r = (self.v0**2) *  np.sin(2 * self.theta) / World.gravity
  return r

 def _compute_height(self):
  h = (self.v0**2) * (np.sin(self.theta)**2)/(2*World.gravity)
  return h
2. กำหนดค่าคงที่ต่างๆ
start = (0,0) # initial starting point
radius = 0.2 # initial
velocities = [10,12,14,16] # variety of velocity of launch
thetas = [30,45,90,135,150] # variety of angle of launch
colors =['red','green','blue','orange','violet'] # color list for particle
margins = (5,5) # margin of drawing area
fps = 6 # frame per second of animation
3. สร้าง particles
circle1 = Particle(center=start,radius=radius,color=colors[0],theta=thetas[0] ,velocity=velocities[1])
circle2 = Particle(center=start,radius=radius,color=colors[1],theta=thetas[1] ,velocity=velocities[1])
circle3 = Particle(center=start,radius=radius,color=colors[2],theta=thetas[2] ,velocity=velocities[1])
circle4 = Particle(center=start,radius=radius,color=colors[3],theta=thetas[3] ,velocity=velocities[1])
circle5 = Particle(center=start,radius=radius,color=colors[4],theta=thetas[4] ,velocity=velocities[1])
4.นำข้อมูลมากำหนดเงื่อนไขการแสดงภาพ
t_max = max(circle1.time_of_flight,
     circle2.time_of_flight,
     circle3.time_of_flight,
     circle4.time_of_flight,
     circle5.time_of_flight)  # to find maximum time of flight among all particles
t_index = np.arange(0,t_max,0.01)  # to create array of time index for finding out where the particle should be at a time

# define area of drawing
x_max = max(circle1.max_range,
     circle2.max_range,
     circle3.max_range,
     circle4.max_range,
     circle5.max_range)  # to find maximum of range in x axis

x_min = min(circle1.max_range,
     circle2.max_range,
     circle3.max_range,
     circle4.max_range,
     circle5.max_range)  # to find maximum of range in x axis

if x_min > 0 : x_min =0

y_max = max(circle1.max_height,
     circle2.max_height,
     circle3.max_height,
     circle4.max_height,
     circle5.max_height ) # to find maximum of range in y axis

y_min = max(circle1.max_height,
     circle2.max_height,
     circle3.max_height,
     circle4.max_height,
     circle5.max_height ) # to find maximum of range in y axis

if y_min > 0 : y_min =0
5.สร้างพื้นที่(ในหน่วยความจำ)และกำหนดเงื่อนไขสำหรับการวาด
# to figure out the axis object
fig = plt.figure() # create area of drawing
ax = plt.axes(xlim=(x_min - margins[0], x_max + margins[1]), ylim=(y_min - margins[0], y_max+margins[1]))
ax.set_aspect('equal')

# add particles to the list and prepare to draw on screen
ax.add_patch(circle1.get_particle())
ax.add_patch(circle2.get_particle())
ax.add_patch(circle3.get_particle())
ax.add_patch(circle4.get_particle())
ax.add_patch(circle5.get_particle())
6.กำหนดเงื่อนไขการแสดงออกของ Particle แต่ละ Particle ที่เปลี่ยนไปตามเวลา
def animate(i):
 t = t_index[i]
 circle1.set_position_by_time(t)
 circle2.set_position_by_time(t)
 circle3.set_position_by_time(t)
 circle4.set_position_by_time(t)
 circle5.set_position_by_time(t)
 return circle1.get_particle(),circle2.get_particle(),circle3.get_particle(),circle4.get_particle(),circle5.get_particle(),

anim = animation.FuncAnimation(
 fig=fig,
 func = animate,
 frames=int(len(t_index)),
 interval=int(len(t_index)/fps),
 blit=True)
7.แสดงผล
plt.show()
ได้เวลาทดลอง
1. ทุก particle มี angle of lauch = 90 องศา แต่มี velocity of launch ต่างกัน
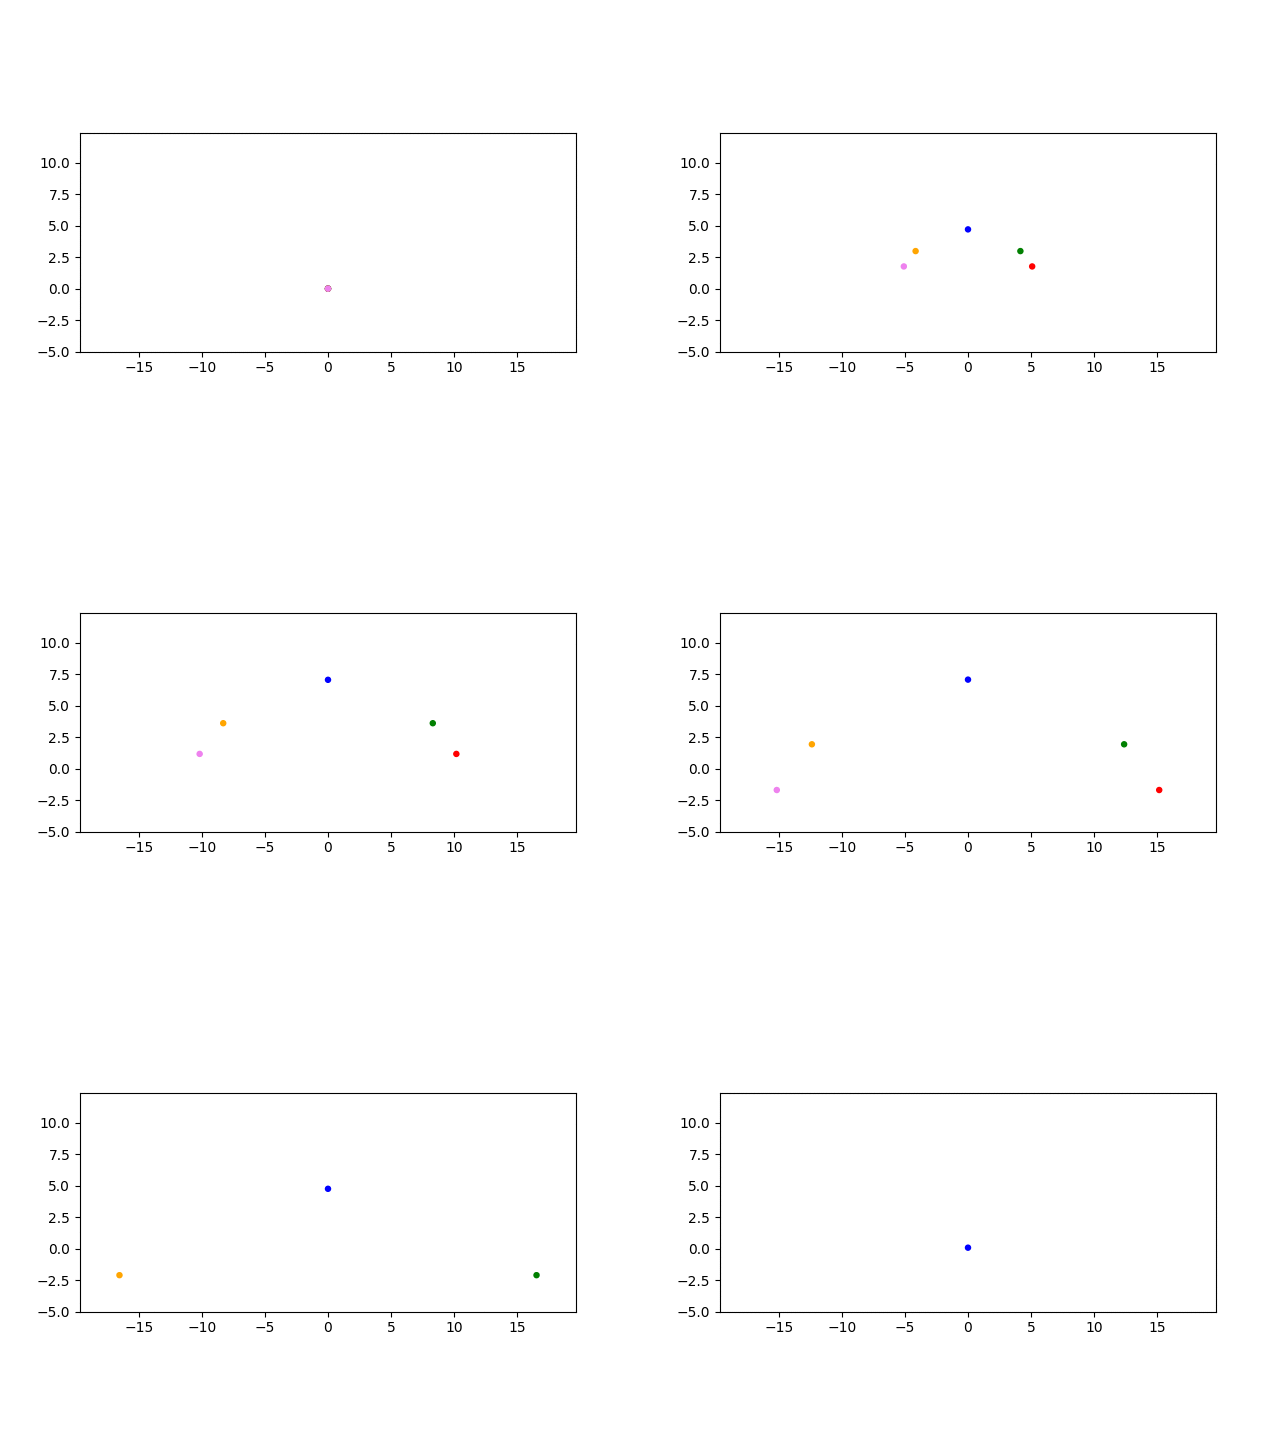
2. ทุก particle มี velocity of launch เท่ากันที่ 10 unit/s แต่มี angle of launch ต่างกัน (ไม่เกิน 90 องศา)
3 .ทุก particle มี velocity of launch เท่ากันที่ 10 unit/s แต่มี angle of launch ต่างกัน (เกิน 90 องศา)
4. เพิ่มพฤติกรรมการเปลี่ยนขนาดให้กับ particle
[ตอนที่ 1] [download code]
เอกสารอ้างอิง
[1] https://raspberrypi-thailand.blogspot.com/2018/04/projectile-matplotlib.html
[2] https://somchaisom.blogspot.com/2018/04/physic-projectile-motion.html
Sign up here with your email


ConversionConversion EmoticonEmoticon